How to Install Pip on Mac {Step |
您所在的位置:网站首页 › install via › How to Install Pip on Mac {Step |
How to Install Pip on Mac {Step
|
Introduction Pip is a package management system used for installing and managing Python software packages and libraries. The software and libraries are stored in a repository called the Python Package Index (PyPI). In this tutorial, you will learn to install pip on macOS using three methods. 
Prerequisites A system running macOS Python installed A user account with administrator-level privileges Install Pip on macOS via get-pip.pyThe get-pip.py method installs pip via the command line. The script automatically downloads and installs the pip package for Python. Important: Install pip via get-pip.py only with Python3 or later. This method doesn't work for earlier versions. Learn how to upgrade to Python3. Follow the steps below to install Pip: 1. Press Command + Space Bar and type in Terminal. Click the app icon to open a new terminal window. 2. Check your Python version to make sure Python3 is installed: python3 --version
3. Download pip by running the following command: curl https://bootstrap.pypa.io/get-pip.py -o get-pip.pyThe curl command allows you to specify a direct download link. Use the -o option to set the name of the downloaded file. 
4. Install the downloaded package by running: python3 get-pip.py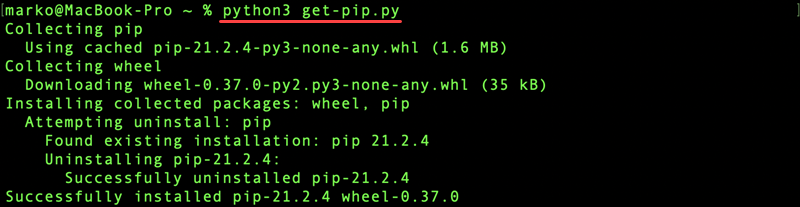
Wait for the installation to finish. Now you have successfully installed pip on your Mac. Install Pip on macOS via easy_installThe easy_install method features a Python module bundled with setuptools for managing Python packages. easy_install was the default Python package manager before pip. Warning: easy_install has been deprecated and may result in a broken installation. The recommended method to use is get-pip.py or ensurepip. Also, do not use this command for a homebrew-based Python installation and prevent installing pip with root credentials for the wrong Python. Open a terminal window and run the following command to install pip via easy_install: sudo easy_install pip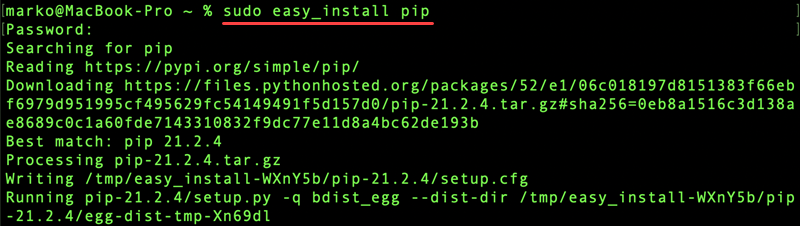
Enter your administrator password and wait for the installation to finish. Install Pip on macOS via brewAnother method to install pip on macOS is through Homebrew, an open-source package manager. Make sure you have Homebrew installed by running the following command: brew install python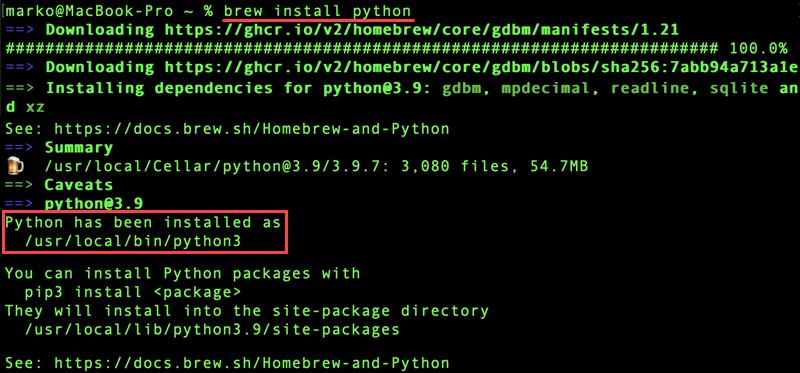
The command installs the latest Python, pip, and setuptools. Note: If pip is still not in your path after installing via brew, the solution is to re-link. Run brew unlink python && brew link python. Since macOS already comes with Python preinstalled, the command installs a separate copy of Python. Having a separate installation has several benefits: The Python2 version shipped with macOS is out of date compared to the latest official Python3 release. Having a separate Python version adds a layer of protection to your system. Install via ensurepipSince version 3.4, Python can install pip with no external commands or internet connection needed. Open a terminal and run the following command to install pip via ensurepip: python3 -m ensurepip --upgrade
The ensurepip command creates a similar pip installation to easy_install. Verify Pip InstallationTo verify that you have installed pip correctly, check the pip version on your system. Open the terminal and enter: pip --version
The output shows which pip version you have on your computer. Conclusion You should now have a working Pip installation on your Mac. Pip is a great way to manage and install packages, with over 50,000 packages available in its repository. If you want to install Pip on a different system, read our tutorials to learn how to Install pip on Windows, Install pip on CentOS 7, Install pip on CentOS 8, Install pip on Debian 9, or Install pip on Ubuntu. |
【本文地址】